TLS certificates for locally hosted webservices
It’s 2024, and there’s generally no excuse for any website to be served over
HTTP instead of HTTPS. While SSL/TLS certificates used to be expensive and
difficult to manage, ever since Let’s Encrypt launched in 2016 it’s become
almost unnervingly simple to generate valid certificates for your own
websites for the exceedingly low price of Free.
But what about locally hosted websites? That is, websites that are hosted on
your local machine, or another machine on your LAN (Local Area Network).
These websites might be accessed via something like http://192.168.1.123:8093
There’s nothing terribly wrong about this; if you’re following tutorials to
set up your home lab, you’ll likely have a whole bunch of services that look
like this. But there are also several reasons why you might not want to
access them via HTTP and the LAN IP:
- It’s kind of ugly and you’d like to be able to use a nicer name like
https://subdomain.mydomain.com - The “Not Secure” badge in the address bar upsets you
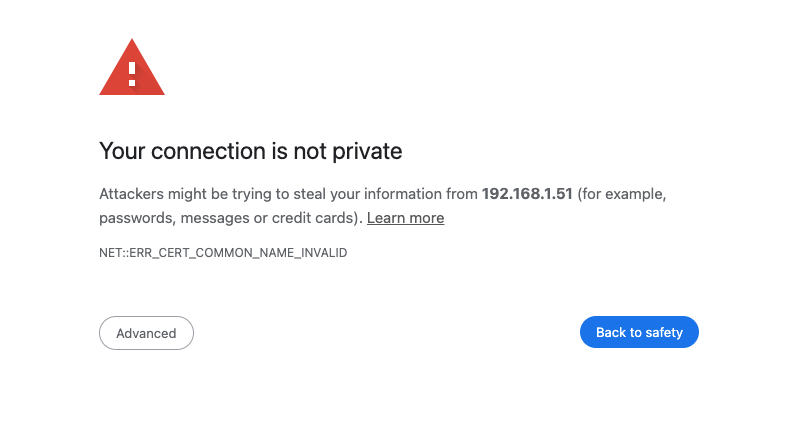
- Sometimes your browser shows a big scary warning screen and you have to
click lots of buttons to proceed (yes, two buttons is lots) - You want to use modern web APIs that are restricted to secure contexts
DNS
Just a quick note here about how to make something like https://subdomain.mydomain.com
point to your non-web-accessible server at 192.168.1.123.
It’s actually very simple - remember that DNS just resolves a domain name to an IP address.
While it may be better to run your own local DNS server,
there’s really nothing stopping you from using something like Cloudflare DNS
to let the whole world know that some domain should resolve to a local IP.
It doesn’t make your local LAN any more accessible to the outside internet.
HSTS preload list
By the way, there’s another reason why you might need a TLS certificate.
Originally, I was happy to just set up DNS and access my sites via HTTP.
But there’s this thing called the HSTS preload list
which is hard-coded into modern browsers. Any domain that appears on this
list is forced to upgrade to HTTPS, even if it was originally accessed via
HTTP and the webserver didn’t request an upgrade.
The surprising part is that Google added all of the TLDs that it owns
to the HSTS preload list.
This means that if you have a .dev or a .you domain or any of the other
50+ TLDs that Google owns, you literally must have a valid TLS certificate
for your websites.

Standard Let’s Encrypt setup
The problem is that the most stock-standard method of deploying Let’s Encrypt
certificates requires that your website is accessible to the public internet,
so that Let’s Encrypt’s servers can access a file on your webserver and prove
that you have control over that webserver. The process looks something like this:
- You install
certboton your webserver, which automates the whole process certbotputs a file on your webserver which contains a special token,
making it accessible athttp://<YOUR_DOMAIN>/.well-known/acme-challenge/<TOKEN>- Let’s Encrypt’s servers access that file, verifies its authenticity, and
issues you a certificate certbotcan even update your webserver configuration to use this
certificate to properly handle TLS termination
This is called the HTTP-01 challenge, and you can issue a certificate for a
particular domain using this method. The main benefit is that the entire
process is entirely automated, since certbot can modify your webserver
to pass the challenge. It can even handle renewals, which is amazing.
Some sub-optimal workarounds
Temporarily make your local webserver public accessible
After letting certbot and Let’s Encrypt complete the HTTP-01 challenge
successfully, you could turn off your port forwarding and you would have a
valid certificate…for 90 days. Have fun doing that every 90 days for
certificate renewal, not to mention how icky is feels to have your private
webservers open to attack, even temporarily.
Be your own Certificate Authority
Instead of letting Let’s Encrypt or some other recognised CA sign your
certificates, you could become your own CA and sign certificates for your
services. But this means that every device that you want to use with your
services has to recognise your new CA by installing the CA root certificate
on it.
Good luck doing that for your computer(s), mobile devices, your spouse’s
devices, any guests that come over…
Confusing advice out there
The main reason I wrote this post is because it’s surprisingly difficult to
find the (really quite simple) solution to this problem. There’s even a
page from
the official Let’s Encrypt website that talks about certificates for
localhost that
seems relevant and is often linked to, but really isn’t.
That page talks about the very specific case about a native app deployed
alongside a webserver to be run on localhost, and the difficulties of
getting a valid certificate issued in this case.
DNS-01 challenge
The DNS-01 challenge is
another method of proving ownership of a domain to issue a certificate. In
fact, it’s actually a stronger proof than the HTTP-01 challenge because it
proves that you own the entire domain (including all sub-domains), instead
of just a single domain name. This means you can issue wildcard certificates
(eg, for *.mydomain.com).
The beauty of this challenge type is that it doesn’t require your webserver
to be publicly accessible; instead you need to add a special record to a TXT
entry on your DNS server to prove ownership.
It’s no secret that this challenge type exists. It’s just rarer - perhaps
because it comes with the somewhat-significant downside of needing to store
API keys for your DNS provider on your webserver to allow certbot to
automate the challenge. Additionally, your DNS provider actually
needs to have API support for creating DNS records. Cloudflare is, once
again, fantastic on this front (and free for simple use cases like ours).
Of course, because our webserver is local and not accessible to the internet,
the attack surface is much reduced and keeping API credentials on the webserver
probably isn’t a big deal.
Putting it all together
Here’s the setup I ended up with:
- DNS records that all resolve to the same local IP address on Cloudflare
(because I haven’t gotten around to setting up a local DNS server yet) - An nginx reverse proxy at that IP, which looks
at theHostheader and forwards traffic to other local webservices - Certbot set up alongside nginx to automate TLS certificate renewals using
the DNS-01 challenge
I’m running nginx in a Docker container because
it makes everything so easy. I even found an off-the-shelf container that
already has nginx and certbot set up. Here’s the docker compose file:
1 | services: |
Here’s the nginx config:
1 | server { |
Note the special # certbot_domain:*.mydomain.com comment. This is a hint
that the scripts in this particular Docker image understand, so that they’ll
ask certbot to use this domain and issue a wildcard certificate instead of
using the server_name and generating a certificate for each subdomain. See
the issue
and the docs
and the example.
The scripts actually automatically add those ssl_* directives. It’s pretty
neat.
After this simple config, you can now access https://subdomain.mydomain.com
and everything works perfectly.